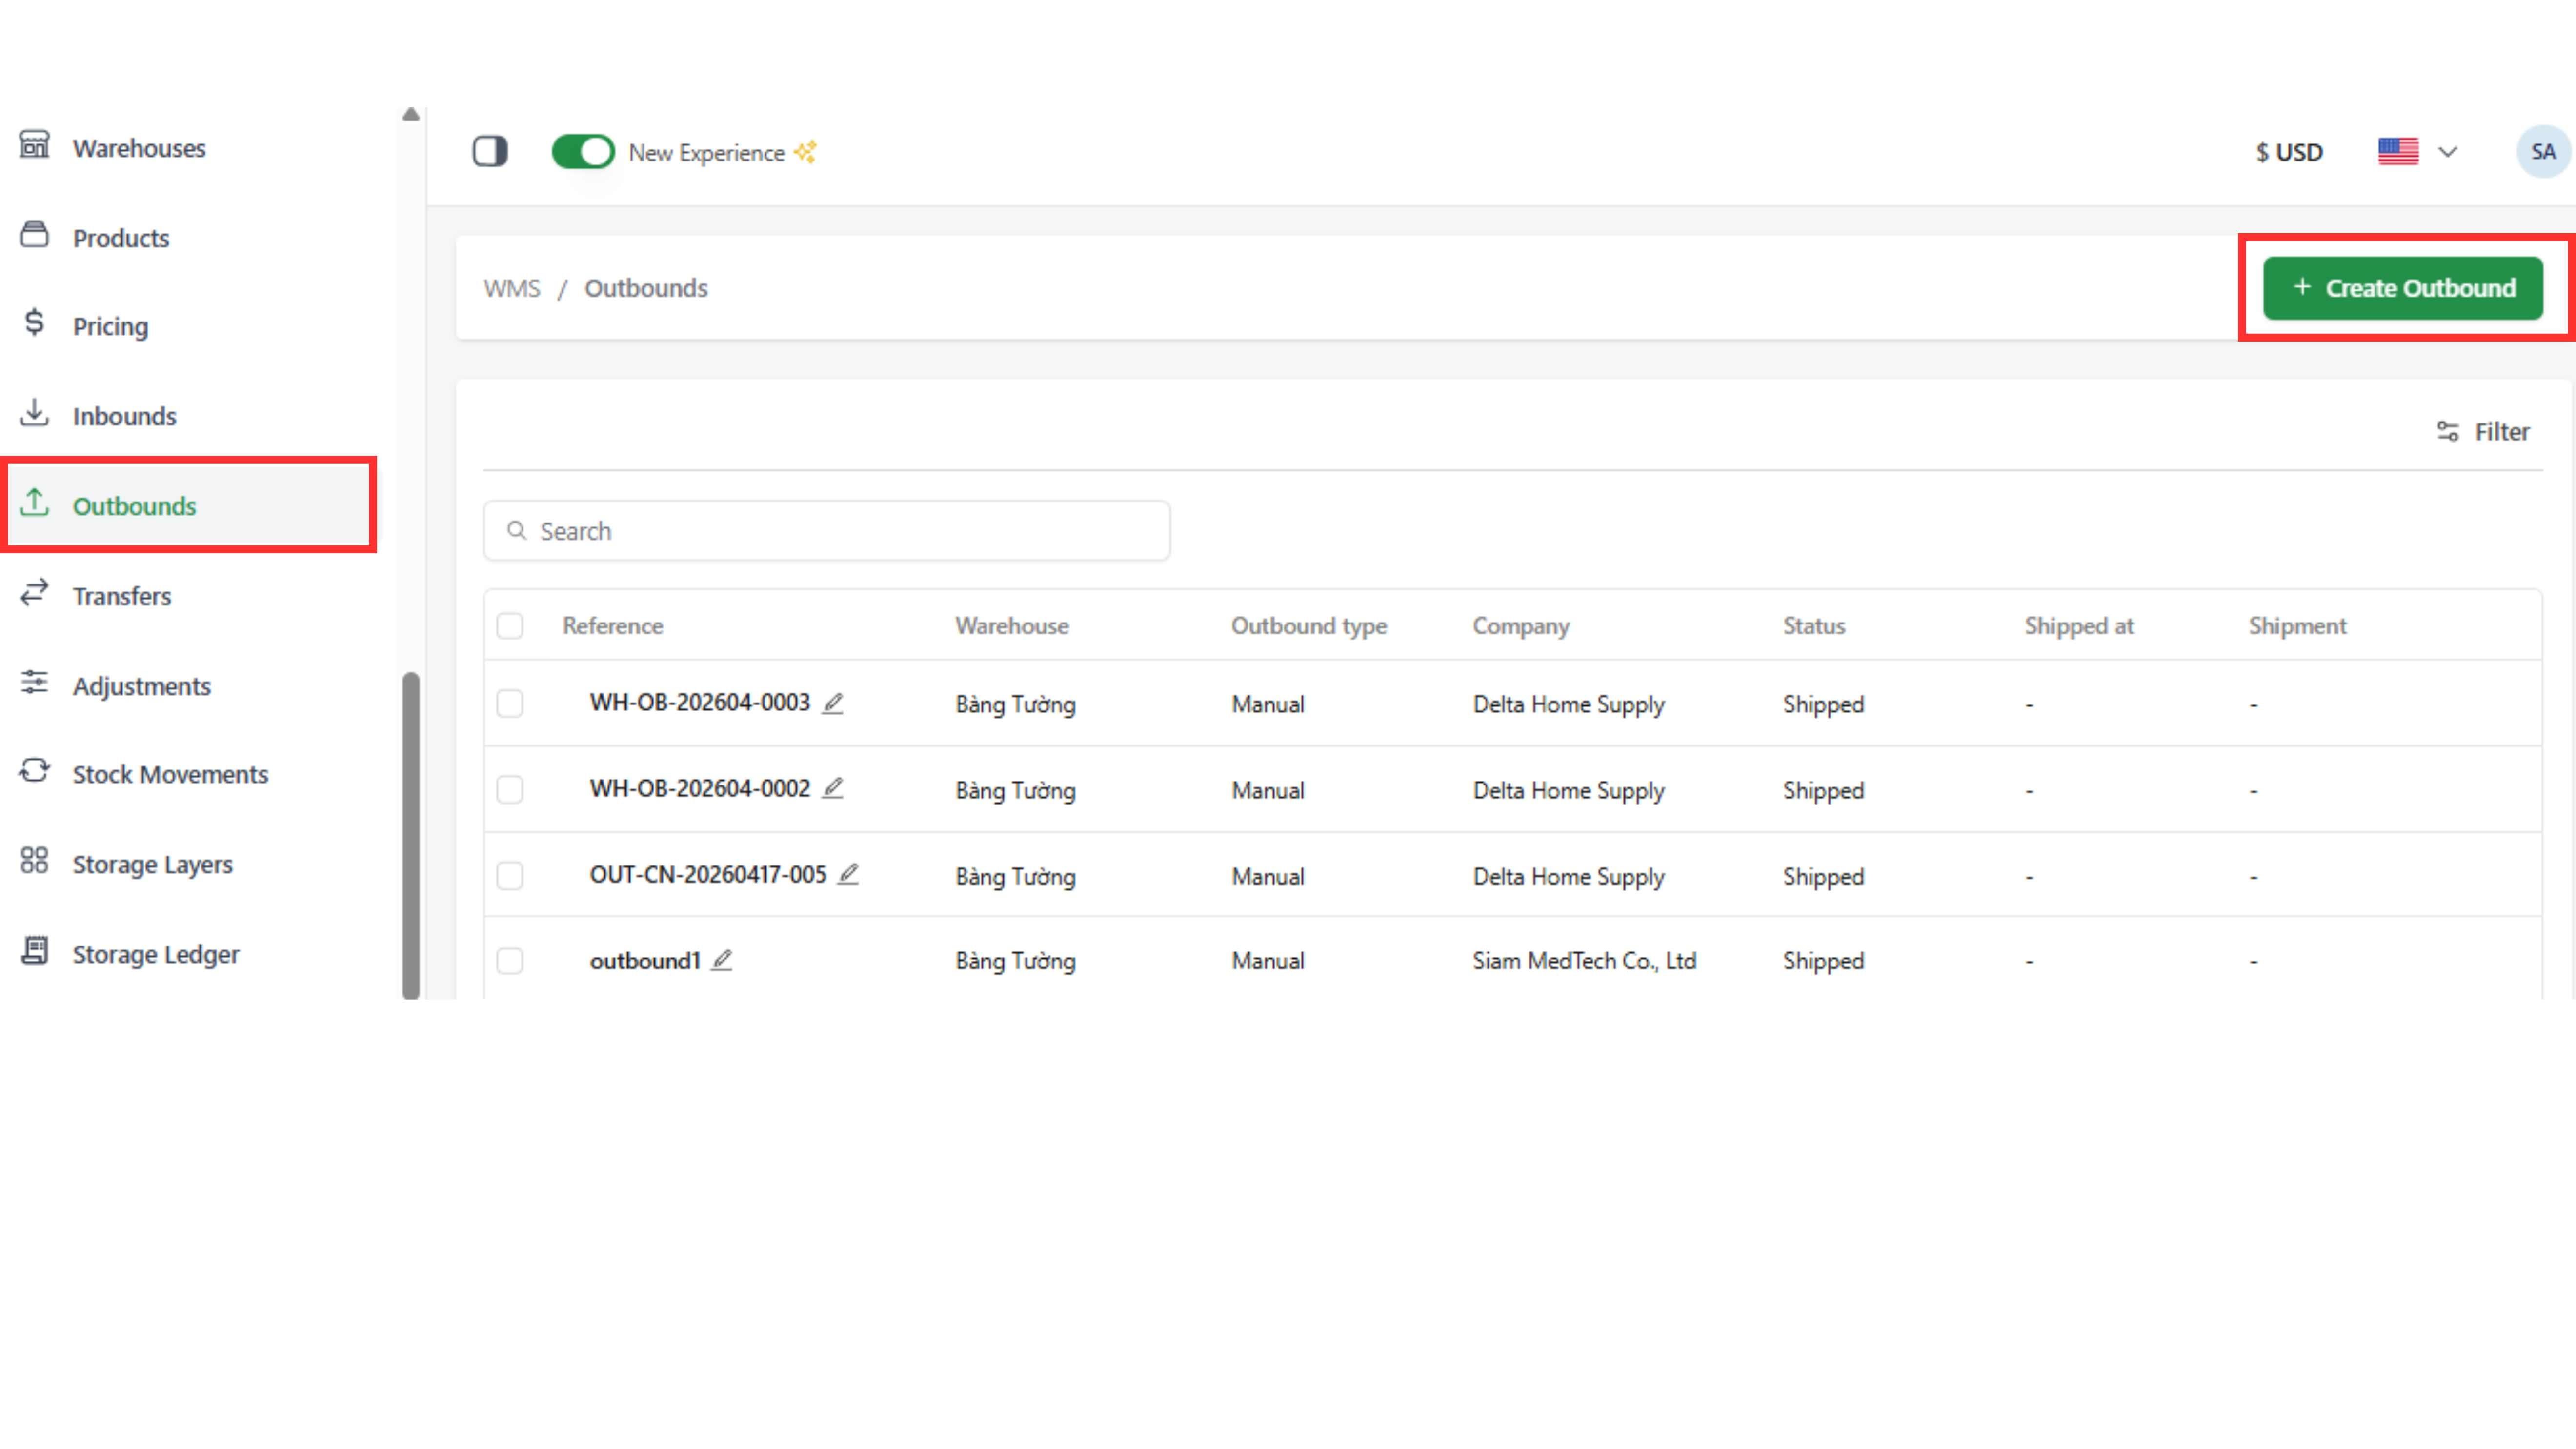
Step 1: Go to the "Outbound” tab and click "Create Outbound” in the top-right corner.
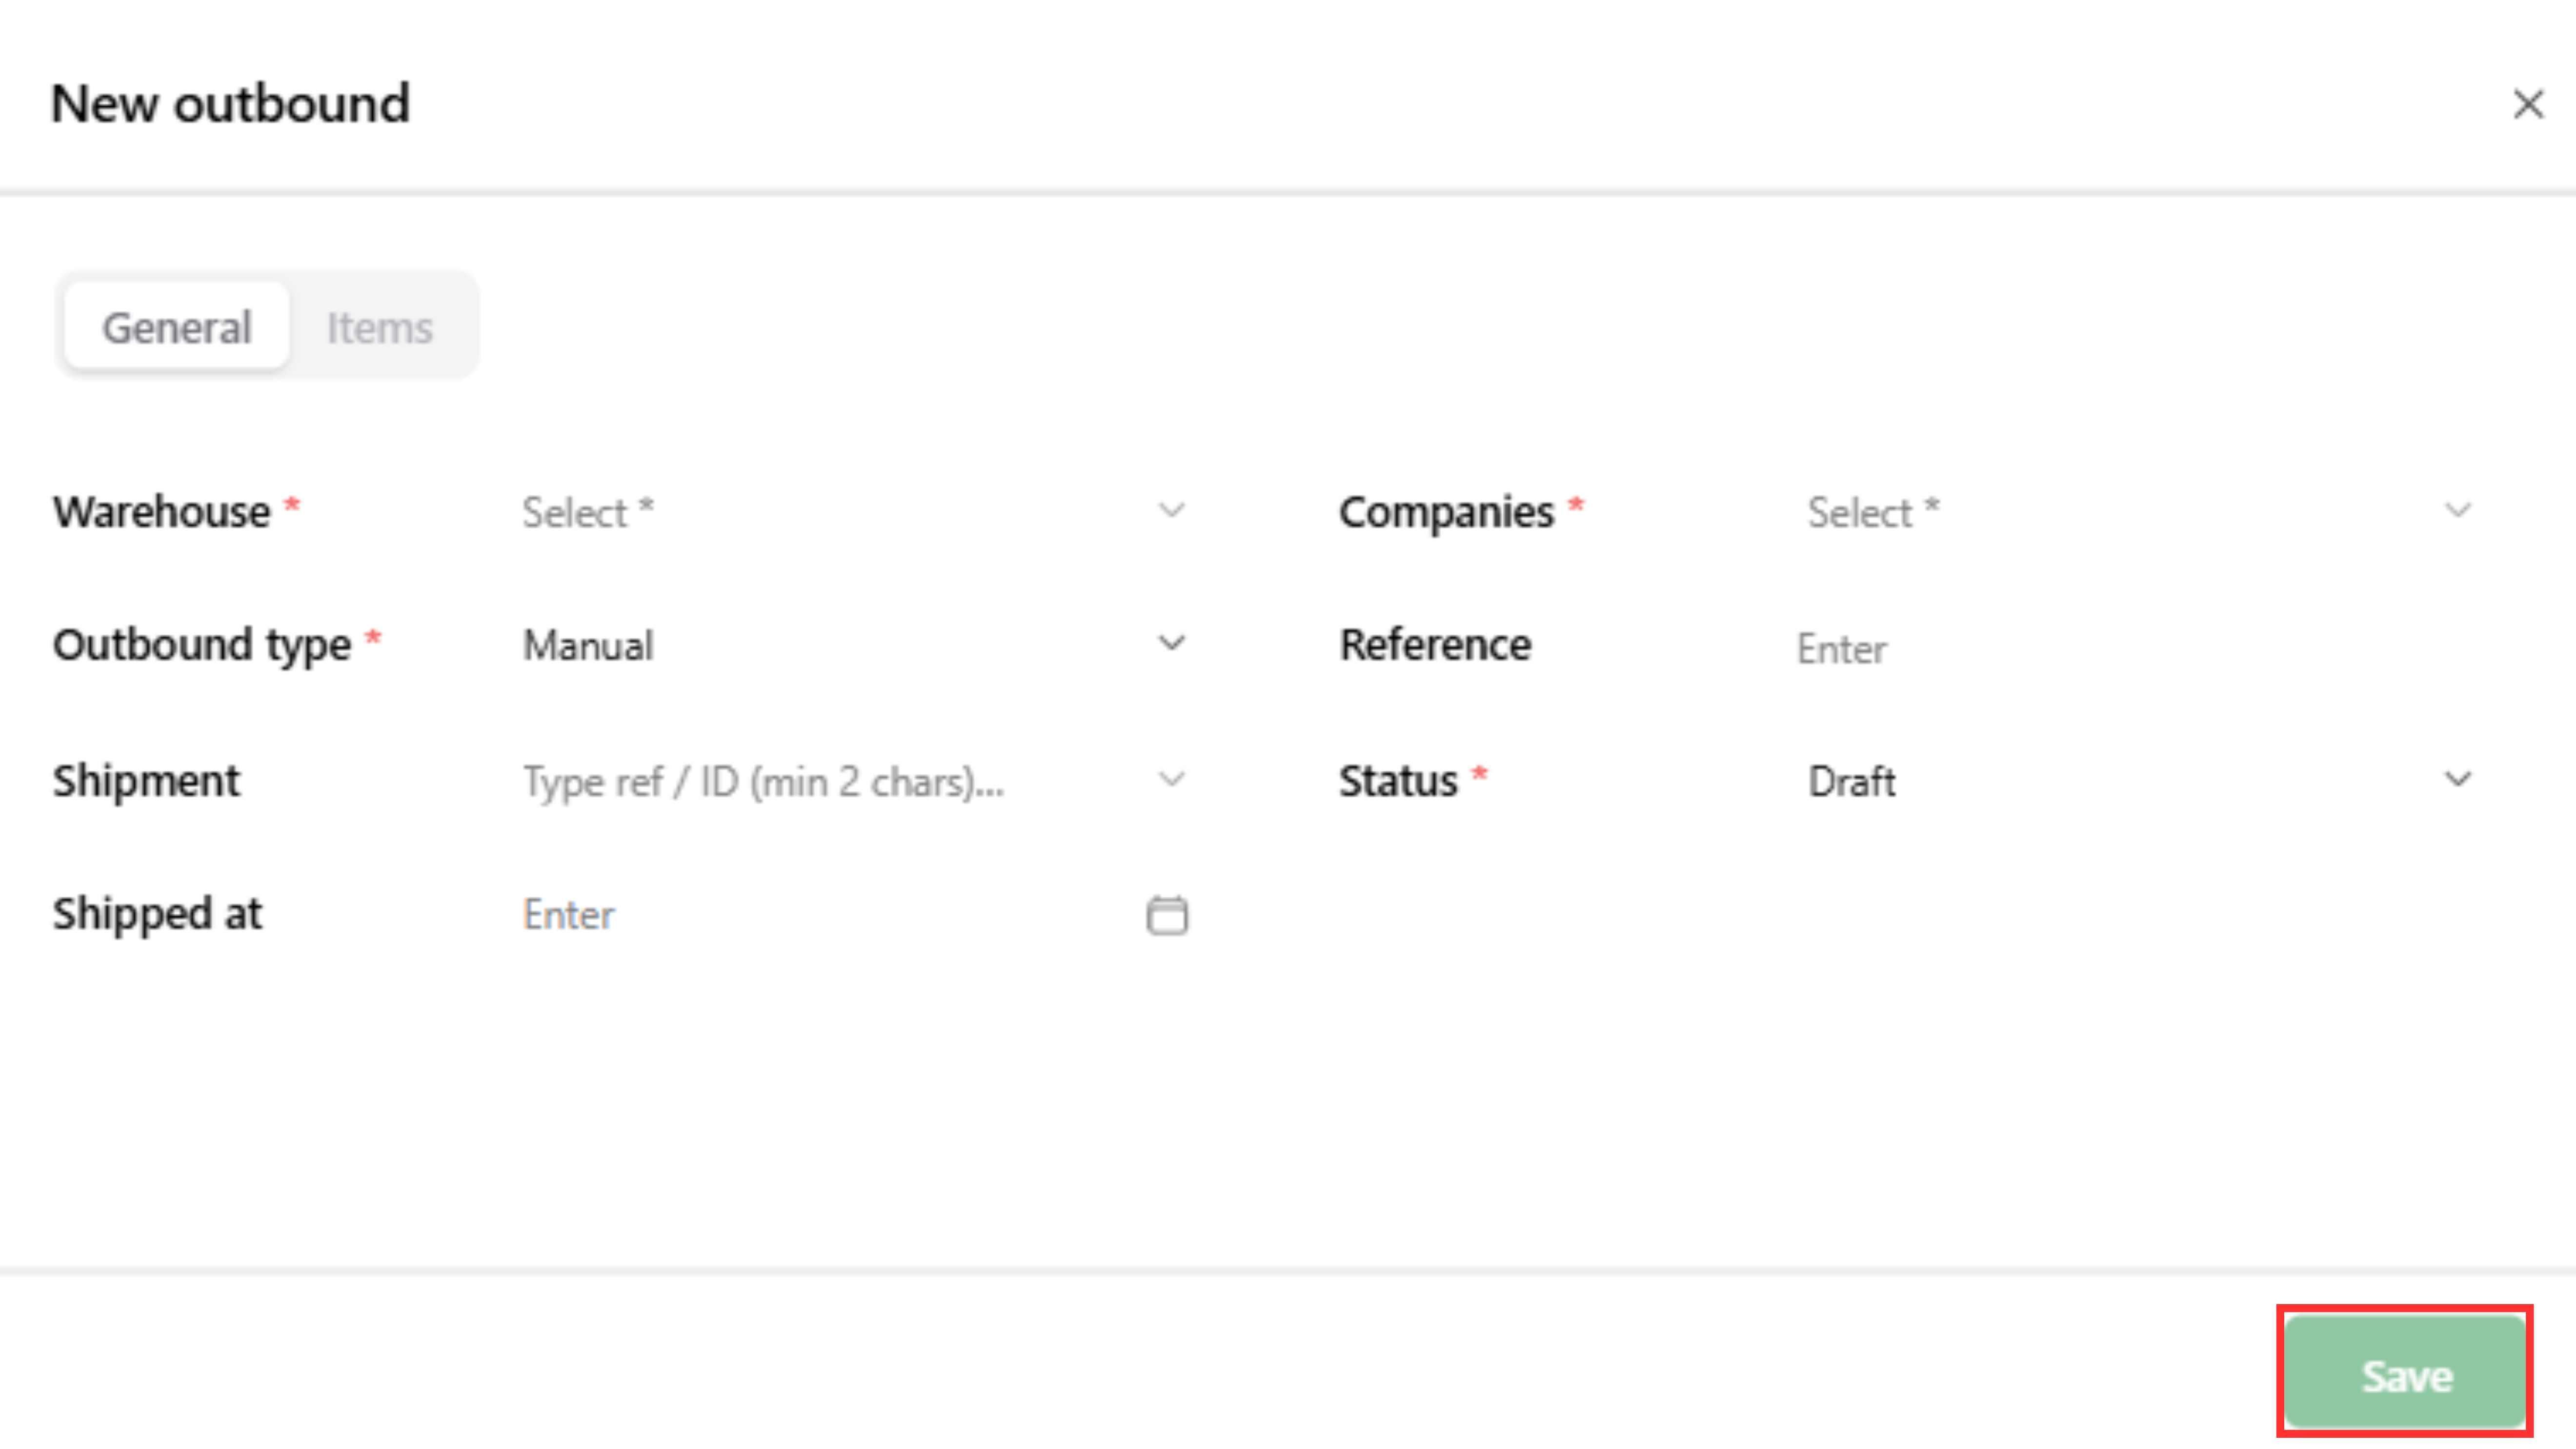
Step 2: Fill in the required fields and click "Save”
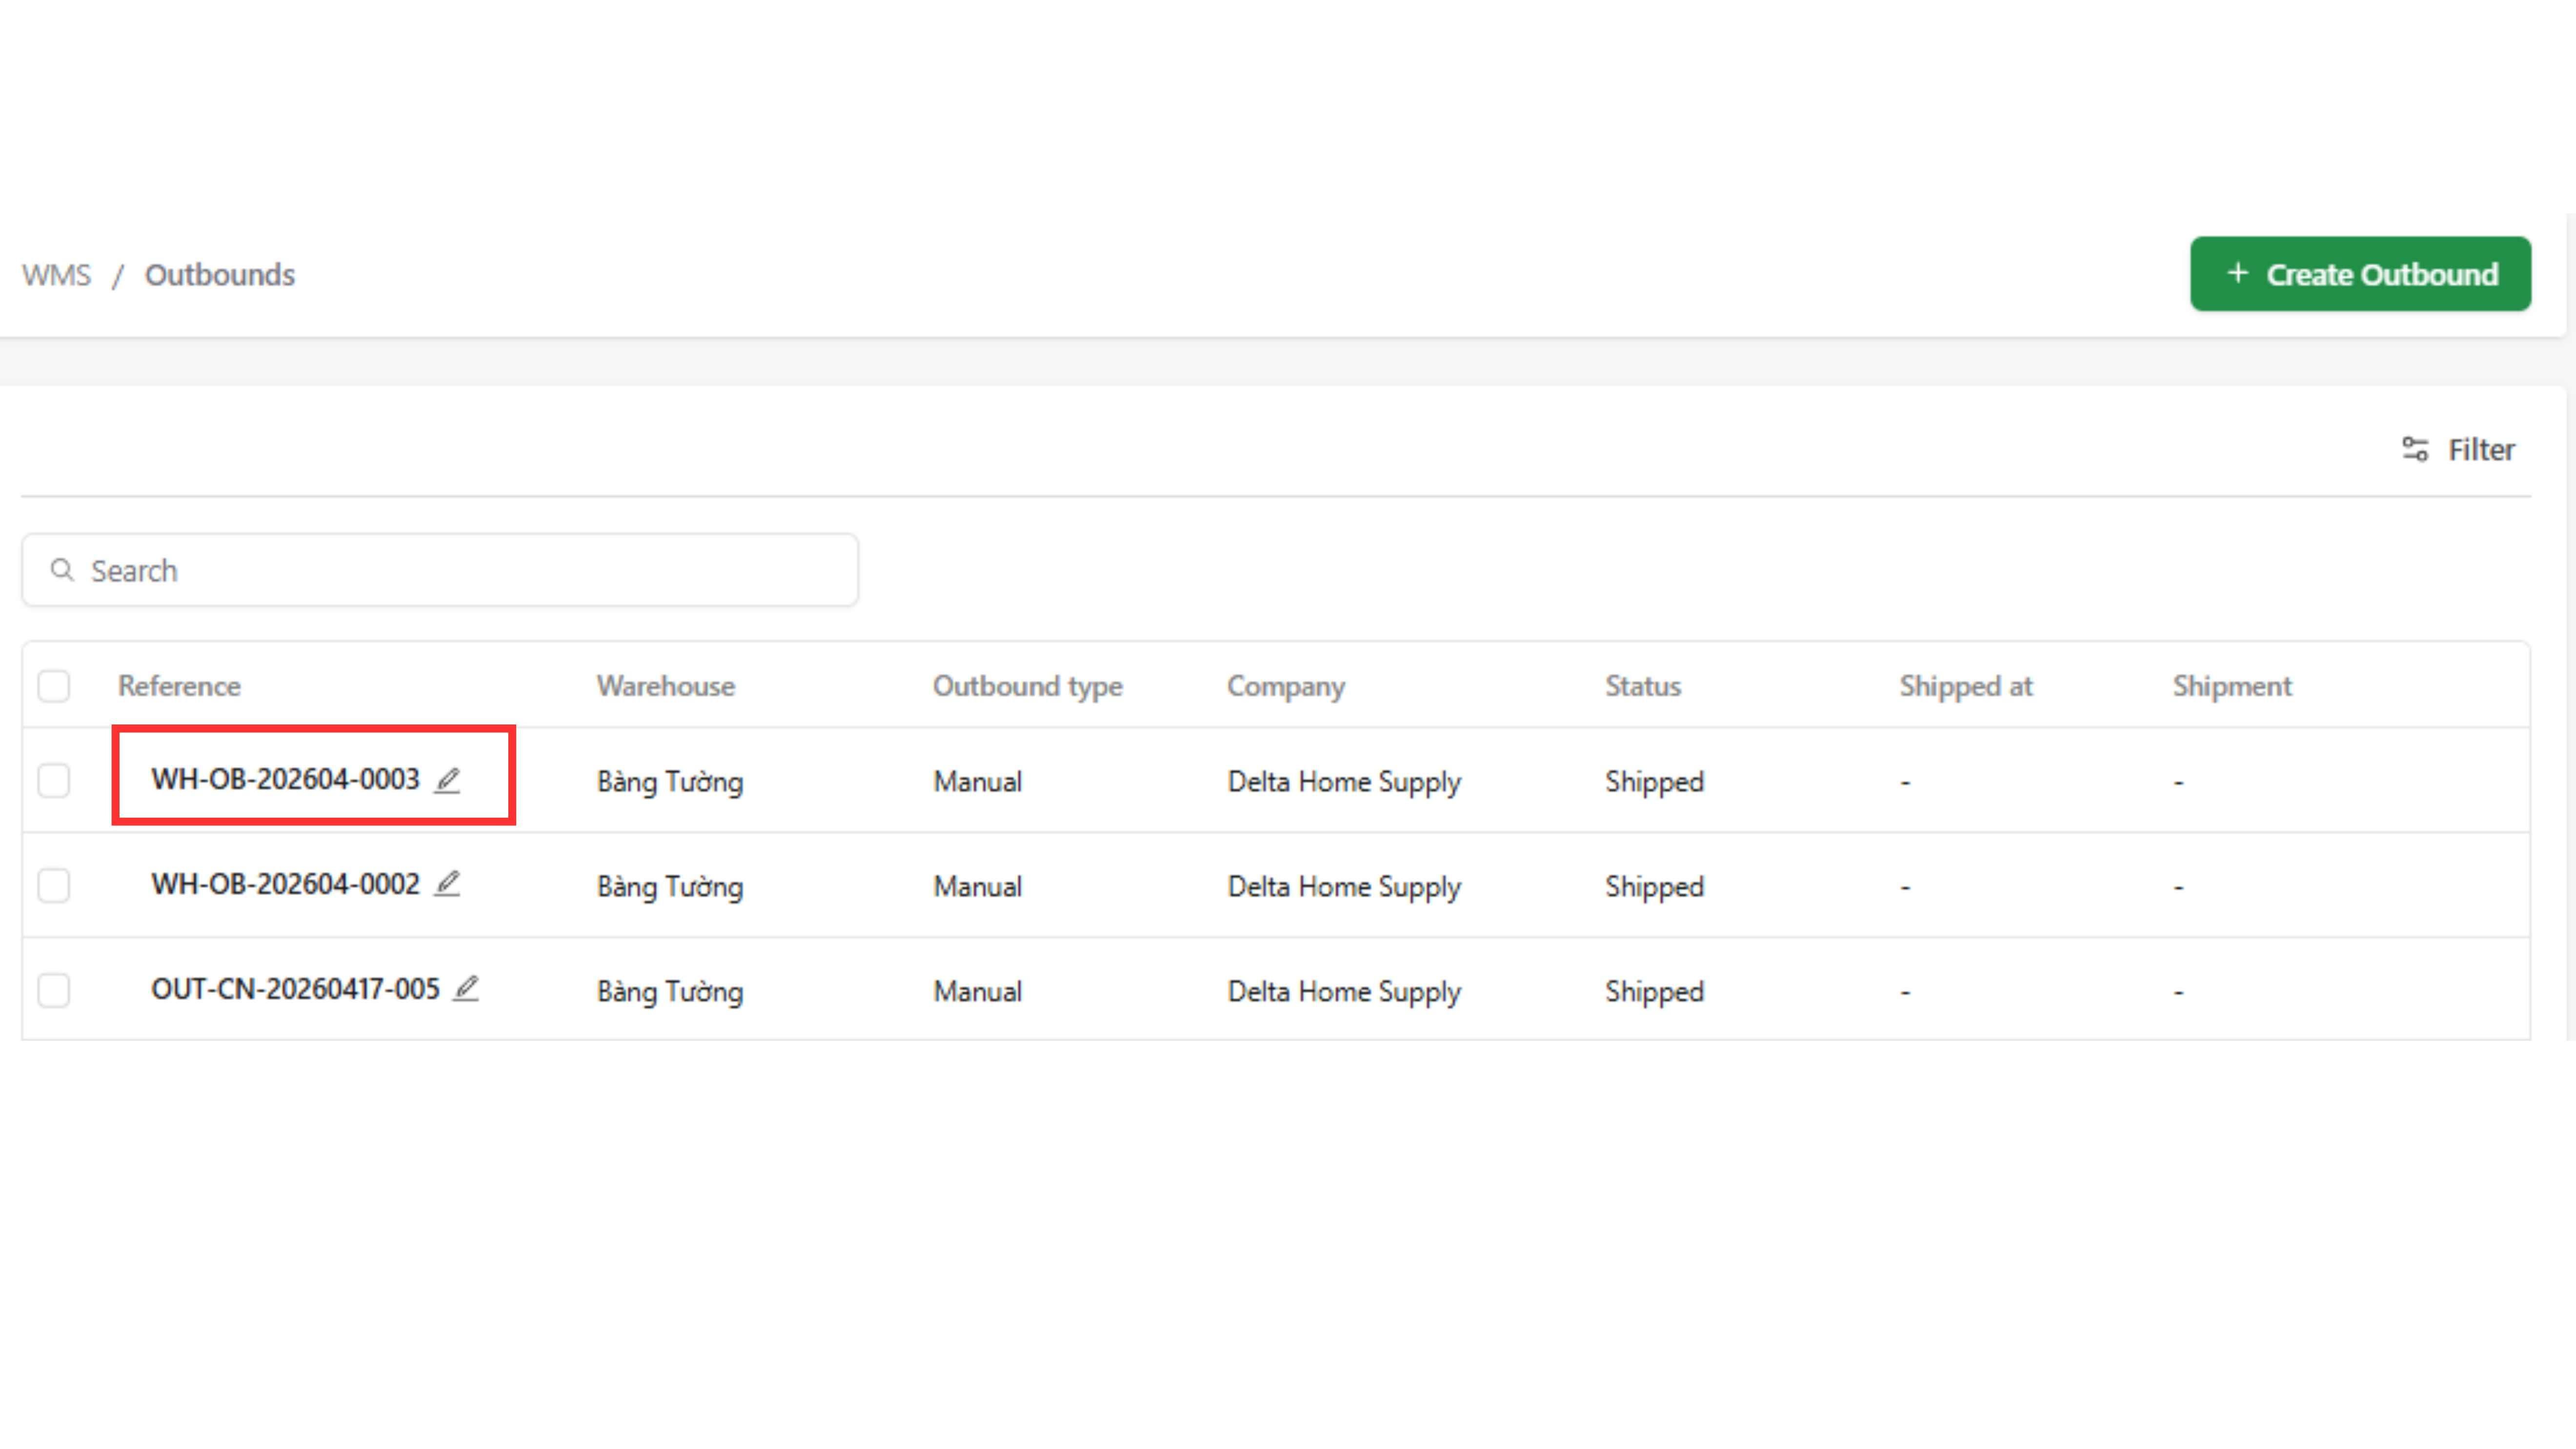
Step 3: Click "Edit” (pen icon)
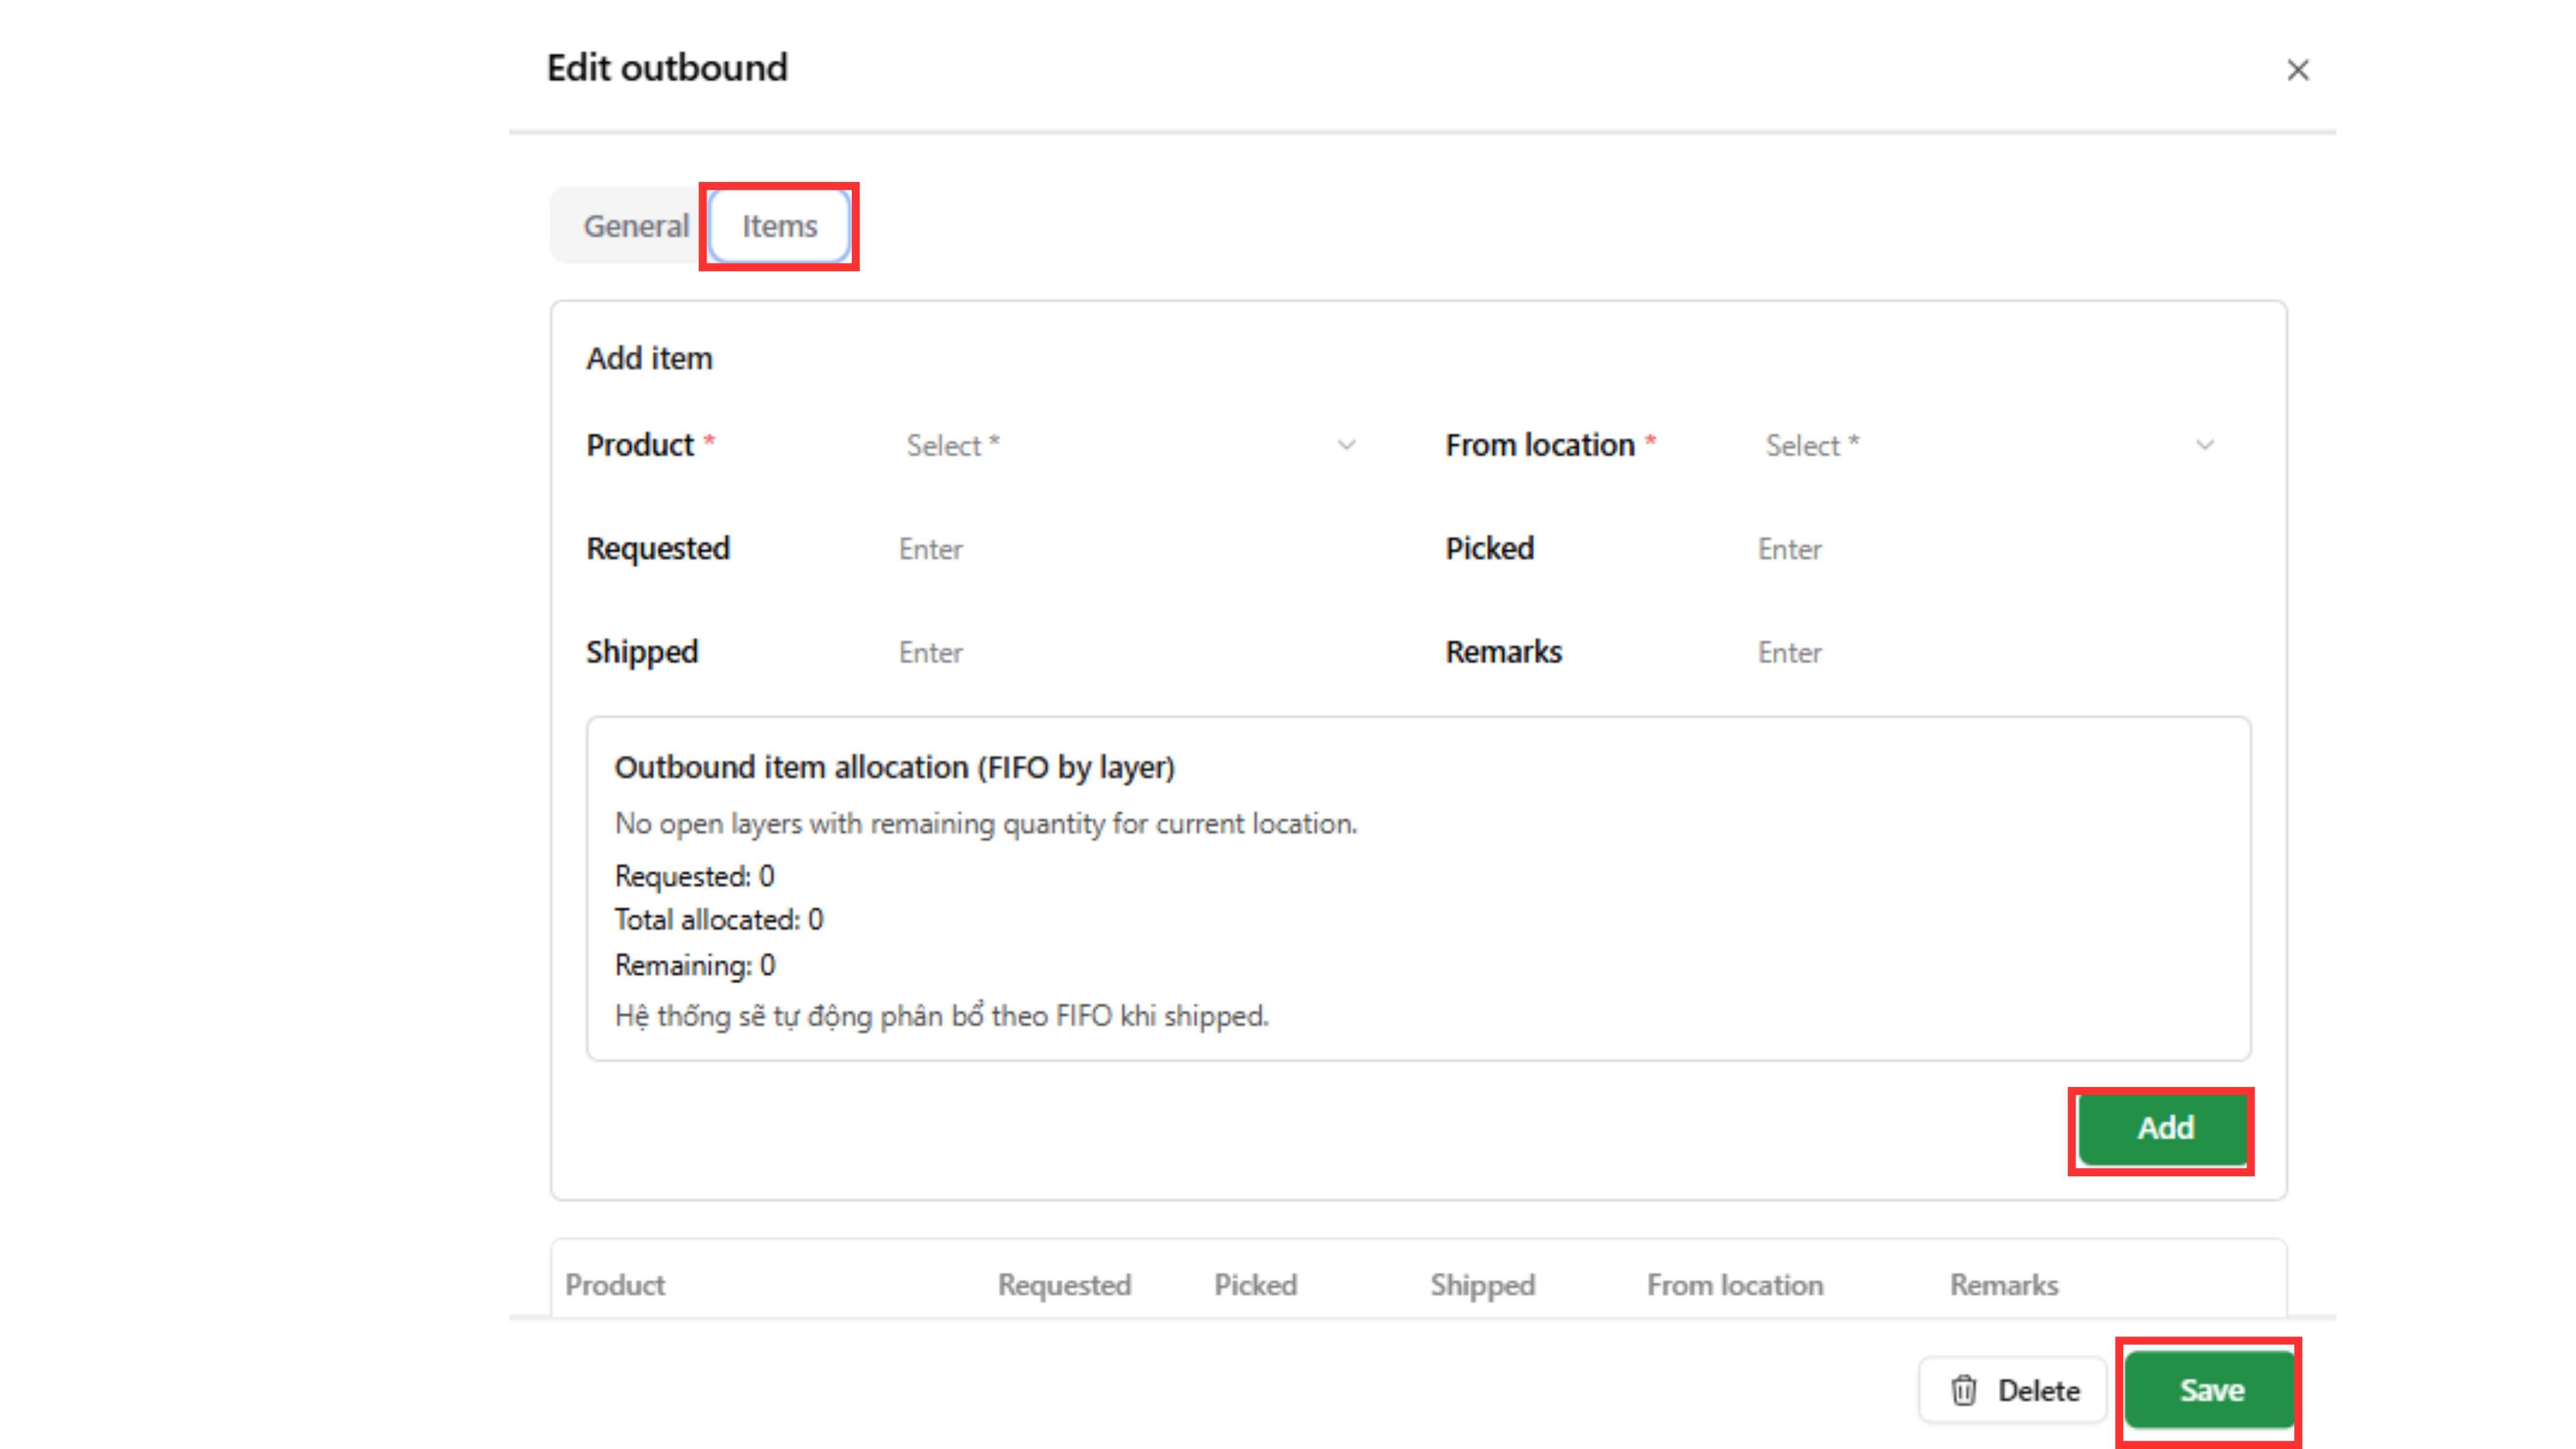
Step 4: Go to “Items” page → fill in the required fields → click "Add” items → click “Save”
Step 5: Change Status → “Shipped” → click “Save”
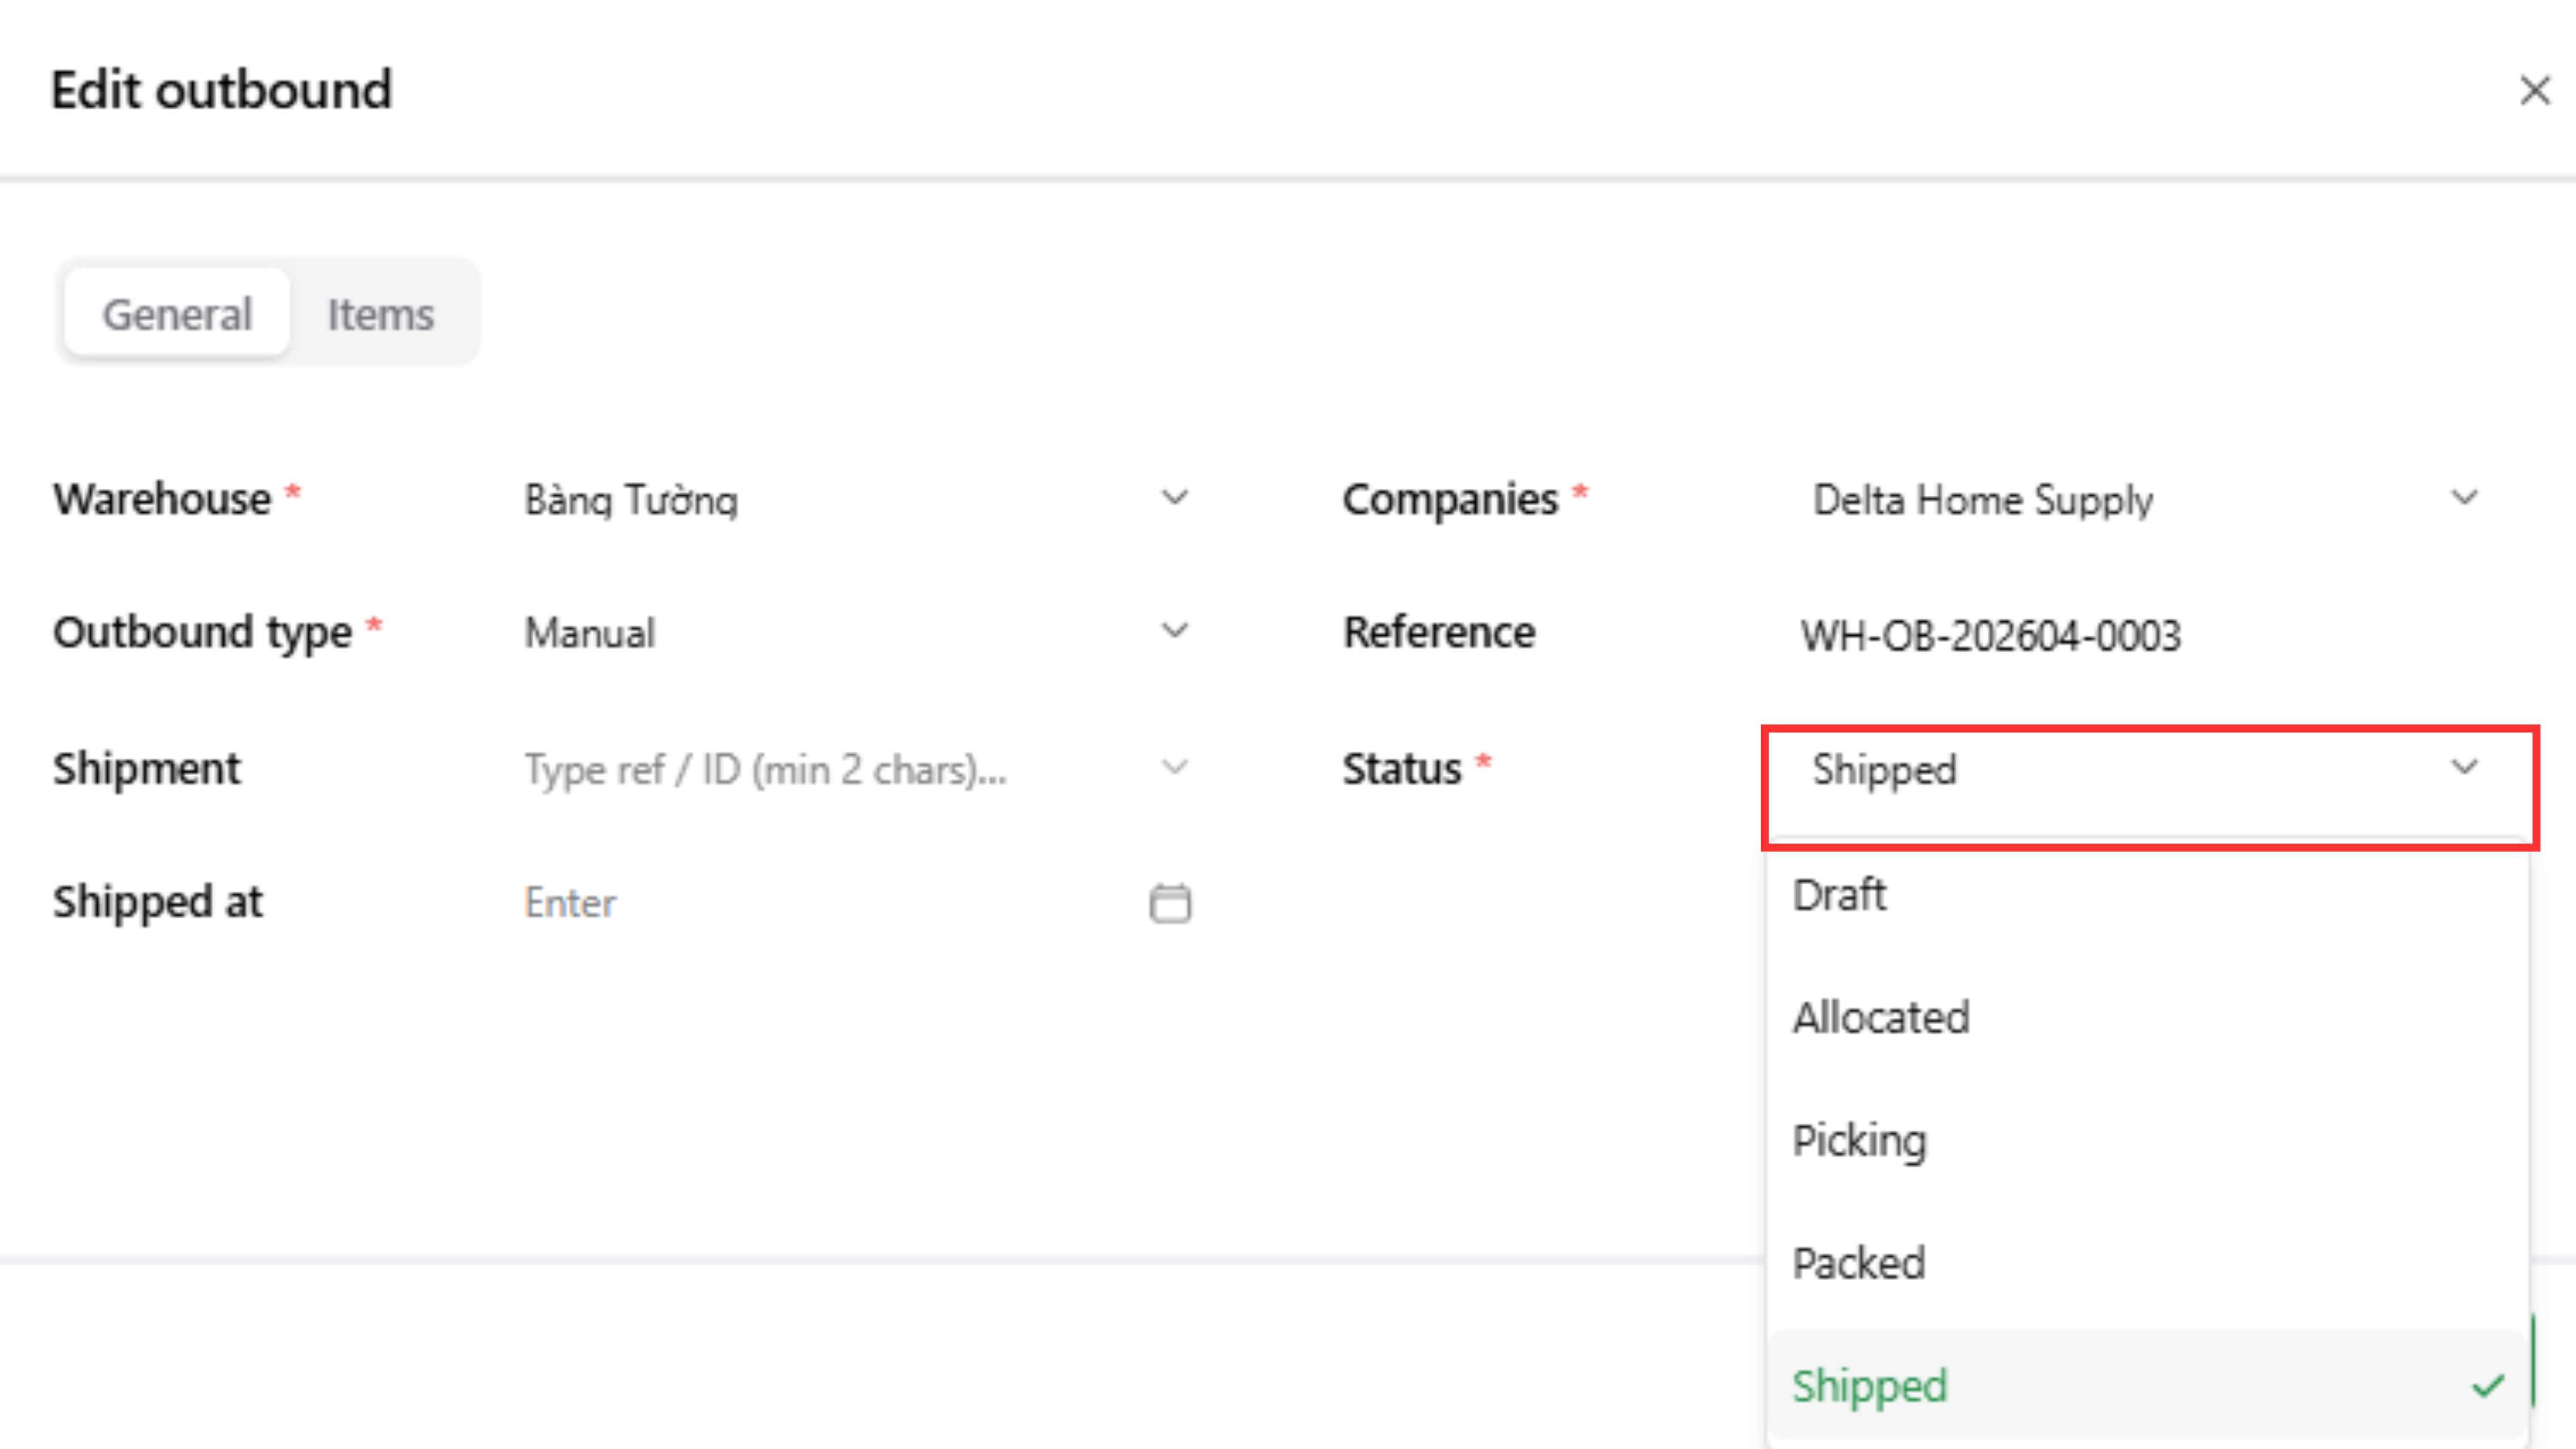
Note:
- Outbound is only recorded into stock movement and storage ledger when status = Shipped
- After status = Shipped, the outbound cannot be edited anymore